The AVOV TVOnline N is a 4K UHD IPTV set-top box. AVOV TVOnline N is an Android-based IPTV box, powered by Android 5.1. It is built for AVOV new middleware called Nova2, though not perfect, it still is a good alternative to take your IPTV and video on demand movies and TV shows. What is Video on Demand?
Starting the device for the first time
Before plugging in the power, be careful and check the correct power. If you own 2 or 3 setup boxes, you have to plug the power cords in separately. If you plug in the wrong power source, the power supply of your box will break. Start to set using the below steps. Connect the power and the HDMI. This will automatically turn on the box. You can see the pairing LED light with red light and blue light on the front of the box. Once your box is starting, you can see our logo for 1 or 2 minutes.
Setting up the box
If you want to adjust your setup box, first you should set the basic options then you correct server option. Otherwise, you can’t set the server and see the VOD. Before setting the server, try to set several steps.
Connecting to WiFi
To connect the wireless network, go to the setting section. Click the ‘Wifi’ menu and you can see your wireless network. Insert your correct wireless password, and it will say connected when done correctly. If it doesn’t display your wireless network, try re-booting the wireless router by unplugging it. A simple method of regaining wi-fi access points are. Turn Hotspot on then off again. Try again Networks will appear.
Adjusting your Time Zone
To set your time zone, go to the setting menu. Click the ‘Time’ menu and you can see all of the time zones in the world. Scrolling up and down to your time zone.
Adjusting your language
To reset the language, proceed to the setting menu. Click the ‘language’ menu and then press any language you want from the list.
How to add IPTV channels to AVOV
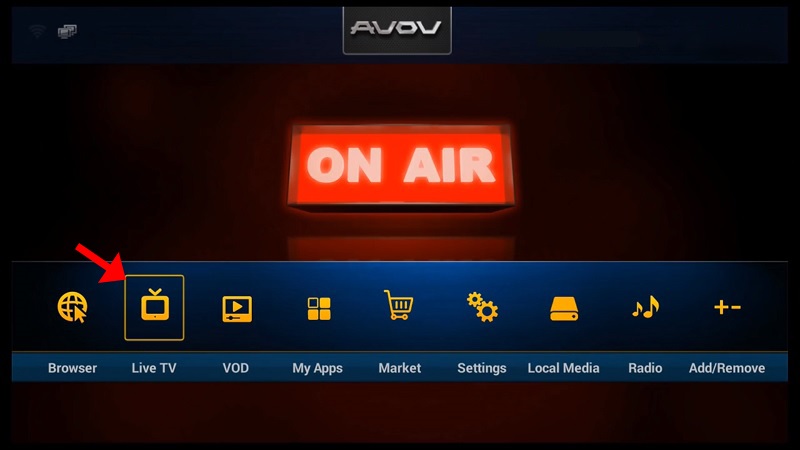
Step 1: Start by clicking on the “Live TV” icon from the main menu. If you are doing this for the first, it will bring you to the servers setting section. If the servers setting section doesn’t appear automatically, follow the below steps.
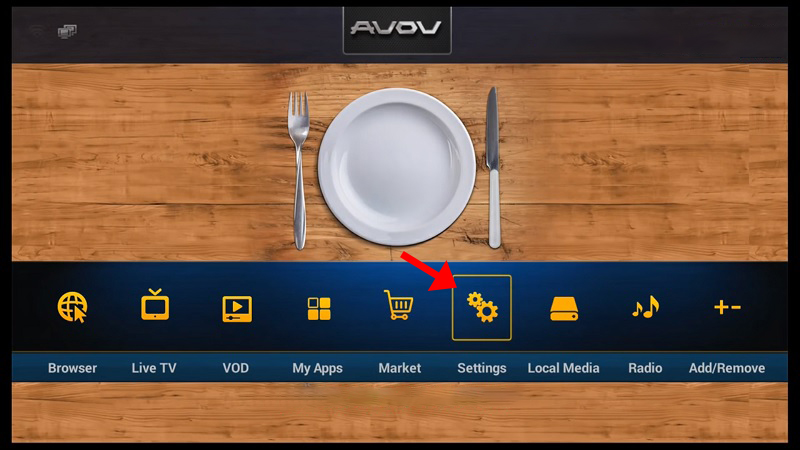
Step 2: Go to the “Settings” section from the main menu.
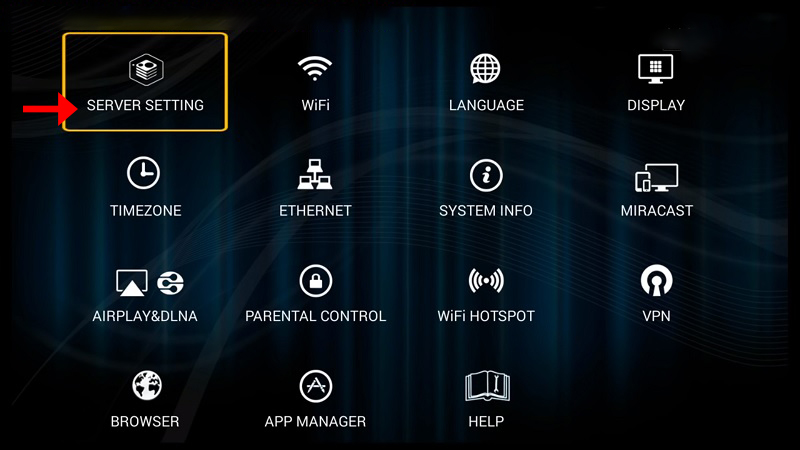
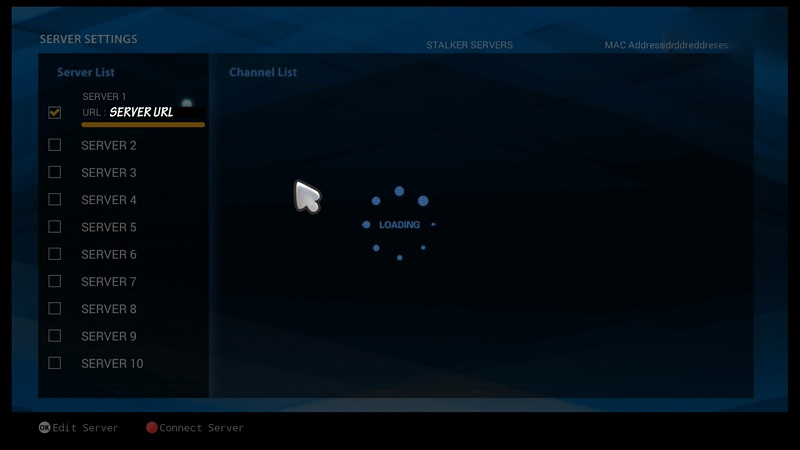
Step 3: Now select “SERVER SETTING” and proceed to the next section.
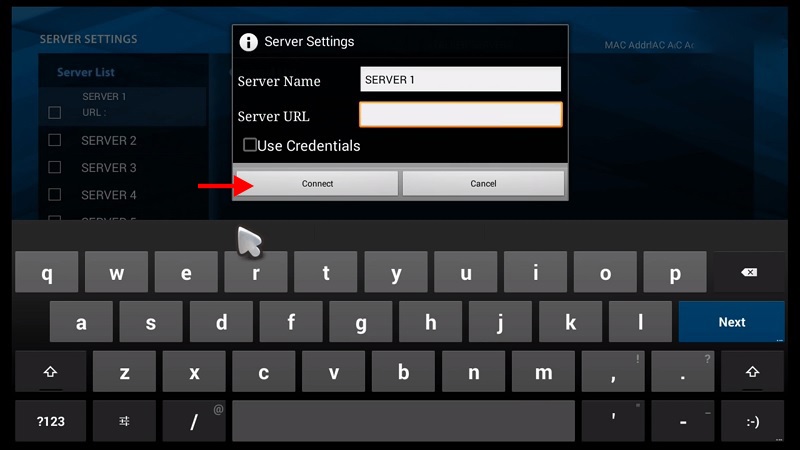
Step 3: Now in the “Server Name” insert a name and it can be anything you want and in the “Server URL” insert the portal address which can be obtained from your IPTV provider and then click on “Connect“. Your device mac address must be registered in side the IPTV providers server.
Please note, you can also use username and password inside your m3u line and connect to the servers. However, using the MAG portal is way simpler.
Step 4: You can see now that the channels are being loaded to your set up box.
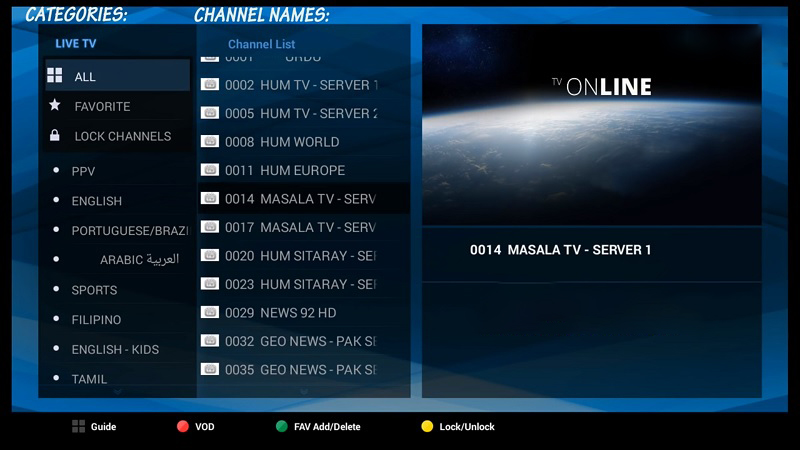
Step 5: Now head back to the main menu and click on “Live TV” icon.
Step 6: You can now click on any channel based on each category and start watching live channels.
Let us know in the comments section below about your opinion and feedback concerning this article. Thank you in advance.
Developed by iptvhelpcenter.com